
I saw someone in Yahoo Answers asking help for setting up WordPress Blog. He downloaded the latest version of WordPress from WordPress.org. Then he was having problem with configuration. This article is totally focused for those who are new in wordpress blogging.
Let me guide you in easy steps to set-up your wordpress blog.
First, you need to download the latest version of WordPress blog platform from WordPress.org. After you’ve downloaded it, you must extract the compressed folder either in root of your website, i.e. www.yoursite.com or in another folder in root i.e www.yoursite.com/blog.
What you do depends upon what you want. If you want your web domain itself as a blog then extract all the files and folders in the root of your domain. Extract all the files in www.yoursite.com using any FTP server like Filezilla. You can also login to your cpanel and extract it to your root folder, i.e. public_html folder.
In, cpanel, the root site, i.e. public_html must look like screen similar to below after extracting well.

If you’ve successfully extracted files in root folder, congratulations, but if you see wordpress folder instead of the image above then move all your files and folders inside worpdress folder to the root page, i.e. public_html. Otherwise, if you want www.yourwebsite.com/blog or similar to that then rename the folder only, that will do the job for you.

After successfully uploading the wordpress platform, you’ll have to manually create a database name, username and password.
Arranging database for WordPress blog manually.
Now a days every web hosts supports PhpMyAdmin page in their cpanel. Look for PhpMyAdmin button in your web host cpanel homepage. If might be listed on Database section. Refer to the image below:

Click on PhpMyAdmin, you’ll be redirected to PhpMyAdmin home page.
Don’t worry about that complicated screen, all you need to do is create a database which will be easier with following step by step image illustrations…
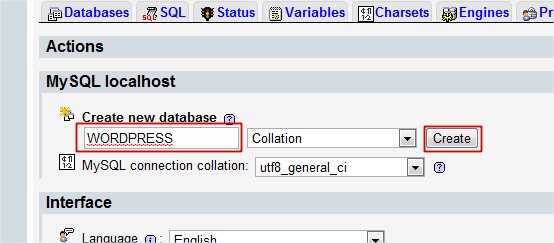
After your home page loads, you’ll see the screen similar to the image below:
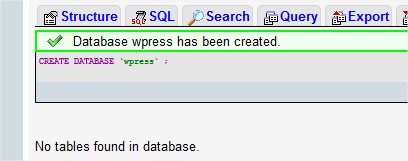
Look for Create new database, there you need to fill your database name. Fill up the database name, for example, I named my new wordpress database, WORDPRESS. After naming, click on create button.
If everything went well, then you’ll get similar screen like below:
After successfully creating database, you’ll need to create a new user for the database, to do so. Follow these steps:
In the same window, look for Privilleges, tab located at the top the screen. See image below for more clarification:

Click on Add a new User link to create a new user for your database.
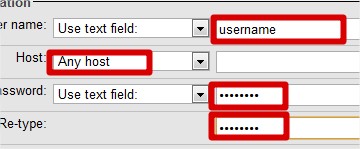
In Add a new User page, fill up the Username, and Password. Leave the Host as Any host. See the image below.

Now scroll down a bit and in Database for user section, check on Grant all privileges on database….. radio button. And in Global Privileges, Click on check all.

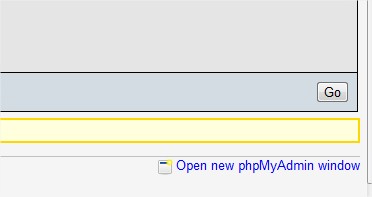
Now at the bottom right corner click on Go button.
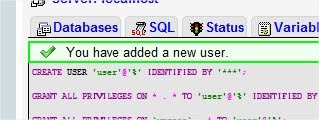
You’ll be notified below the top tab about the addition of new user.
Now you can close the PhpMyAdmin window.
Since you have your database name, username and password, you can go to the root site where you have extracted the wordpress platform from your browser.
Hopefully, when you go to the root site, it will return you Wordress Error page similar to screen below:

Don’t worry about that, Click on Create a Configuration File button.
In next page, click on Let’s go button.
You’ll see the screen similar to this:
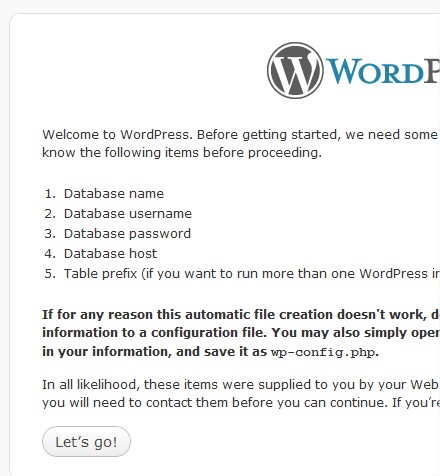
Fill up your Database name, User Name, Password and other things you leave it default, until and unless you have different Database Host. Click on Submit button.

In next page, click on Run the Install button.

In next page, fill up the Site Title, Username for administration, Password and Email. Check on Allow my site to appear in search engines like Google and Technorati, if you want your blog to be indexed in search engines. Then click on Install WordPress button.

You’ll get success message, now you can login to your administrator page by going to, www.yoursite.com/wp-admin or www.yoursite.com/blog/wp-admin with the username and password you’ve specified just before.

Where www.yoursite.com or www.oursite.com/blog is the main page of your blog.

Next is the another journey for the customization of your blog. Bookmark and subscribe us for lots of tutorial you may need to configure your WordPress Blog.
 Posted in
  Tags:
Tags: